 This is a picture of my quilt 'The Face of Envy', far right in this photo, at the Rome GA Art Coterie Juried Exhibition. This is a first for me and it still is hard to imagine that I would ever have something in an art show. They had 399 nationwide entries and selected 47 pieces for the exhibit. Of the 47, they selected 3 fiber pieces and 1 mixed media collage. The rest of the show was paintings, photo and schulptures. I didn't win anything but my piece is hanging in the main gallery room and I did hear that this was considered an honor. I really enjoyed this experience and will definately look for more art shows to enter.

FIBER FABRICATIONS by Judy Alexander, Fiber Artist
Tuesday, April 28, 2009
My Quilt in an Art Show
This is a picture of my quilt 'The Face of Envy', far right in this photo, at the Rome GA Art Coterie Juried Exhibition. This is a first for me and it still is hard to imagine that I would ever have something in an art show. They had 399 nationwide entries and selected 47 pieces for the exhibit. Of the 47, they selected 3 fiber pieces and 1 mixed media collage. The rest of the show was paintings, photo and schulptures. I didn't win anything but my piece is hanging in the main gallery room and I did hear that this was considered an honor. I really enjoyed this experience and will definately look for more art shows to enter.
Wednesday, April 22, 2009
My Online Class at joggles.com
I have been keeping this under wraps but it has finally been announced. I will be teaching an online class at joggles.com. If you haven't discovered this site you are in for a treat. They carry many supplies for art quilting and much more. I am so excited to be sharing my techniques for 'Creating Realistic Landscape Quilts' and hope you can join me in this class. Online classes are a great way to expand your quilting skills in the comfort of your own home and on your schedule.
The main class project that I will be covering is the construction of this quilt that I featured in a previous post.

I will also be dedicating most of a lesson on creating trees since they are such an important part of landscape quilts.
 Here is the complete class description:
Class Description: Have you ever admired a beautiful landscape quilt and wondered how it was created? How would you like to learn to create your own realistic landscape quilts that capture the beauty of nature in fabric? In this five-lesson class you will learn the process from design considerations, fabric selection, creating the illusion of depth, construction to finishing. I will take you through the steps with in depth instruction and detailed examples that will build your confidence and skills. At the end of this class you will have created your own beautiful landscape quilt. Here is a brief description of what we will cover each week.
Lesson 1- We will start out by exploring sources of inspiration, design considerations and fabric selection. We will discover methods for creating our design and choosing sky and water fabric that work together.
Lesson 2- You will learn the construction process, sew the water and sky together, create the illusion of depth by adding distant hills and add reflections to the water. We will also discuss how tulle and organza overlays can change the color or add additional interest to your quilt.
Lesson 3 - This week we will select a foreground for our class project and a take detailed look at creating trees which are always a main focus in successful landscapes. We will use fabric markers and colored pencils to add details to our trees. You will then have the opportunity to create a small landscape with a tree as the main focal point to practice your new skills.
Lesson 4 - Back to our main project with the focus on creating the foreground elements in our quilt. We will learn about selecting the appropriate scale for our objects and will add a path, trees and flowers. We will get out the fabric markers and colored pencils again to put some finishing touches on our quilt.
Lesson 5 - In this lesson we will explore quilting options for landscape quilts. We will also discuss borders, facings, framing and binding options.
Here is the link for more information and class sign-up: class info.
Friday, April 17, 2009
My Favorite Quilt - Bloggers Quilt Fest
 I had to think really hard to pick my favorite. This quilt is called 'Moonrise at Sunset' and is the second quilt I did and was finished in 2006. It is also my first attempt at free motion quilting. Someone in my family saw it and asked if there was some kind of show I could enter it in. I hadn't really thought of showing it but did a search on Google and found a local guild that was putting on their semi- annual show and I entered the quilt. I went to the show with my daughter and granddaughter and was shocked when I came around a corner and saw a big blue ribbon on my quilt. This really gave me the boost of confidence I needed to continue down this path. I have learned so much in the last 3 years and am still excited about all aspects of art quilting. So even if this is not one of my best works it still has a special meaning to me.
Thursday, April 16, 2009
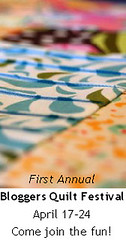
Bloggers Quilt Festival
Starting tomorrow, April 17, you will be able to attend the First Annual Bloggers Quilt Festival. Amy of Park City Girl blog has come up with a great idea. You can read all about this event here. Perhaps you would even like to participate.
New Landscape Quilt - Announcement Coming Soon
 Here is my latest landscape quilt. I went back to basics on this one and only used commercial fabrics. Most of my current work usually has quite a bit of painting involved these days and I did use fabric markers for some of the shading. I really don't have a name for this yet so any suggestions would be appreciated. I made this quilt for a specific purpose and I will share that next week.
Saturday, April 11, 2009
"B" Is For Beets
 I am a little disappointed that my quilt is not a finalist in the QA calendar contests but I did think it was highly unlikely that I would be chosen 2 years in a row. So now I get to share the full picture here.
The background fabric for this quilt was painted with Setacolors. I then added areas of painted Misty Fuse and used a mesh bag as a stencil for more texture. The silver foil was cut from candy wrappers and attached with a fusible web. The ‘beets’ are painted Warm and Natural and the stems are self stick cording from the scrap booking department that I painted and stitched. The leaves are painted lutradur. The edges were burnt with a soddering iron to give them a more natural look. The medallion was cut from printed tissue paper attached with a fusible web, stamped and enhanced with markers and beads. The ‘B’ was cut from timtex, painted and beaded and attached by hand stitching. The piece was then free motion quilted. The tips of several leaves are not stitched down for a more dimensional look. The heart is couched yarn and the text is free motion stitched.
Thursday, April 9, 2009
Rock-on Challenge Quilts
 I entered 2 quilts in the Quilting Arts Magazine Rock-on Challenge. 10 quilts were selected for publication in the latest issue. Of course I was hoping one of mine would be chosen but since they were not I can now show them here. These were really fun to make and I can see doing a whole series of 'rock-on' quilts. They are both 81/2 x 11. I will put the song titles at the end of this post so you can take a shot at guessing the titles.
For this first quilt the background is mono printed on black fabric with Lumiere paints trying to create a psychedelic look. I used Angelina Fibers for the blue light effects. Miss Molly was drawn on paper then traced onto tan fabric and fused to the background. Her face was done with colored pencils. The hair was made with Oliver Twist silk tops covered with tulle. I tried several fabrics for the blue dress and finally found a large tropical bird print panel in my stash that I had bought on the clearance table for $1. I don’t know what possessed me to buy it but I cut up a large blue bird and it was perfect. The devil horns are made of puff paint painted red and of course it wouldn’t be complete without the reference to Chanel No.5. All was free motion quilted.
 To create this quilt I used bright hand dyed fabrics for the fused landscape. I tried to include as many literal references to the song as possible. ‘Lucy’ was stamped on light pink fabric and fused to the sky. The features were then enhanced with colored pencils. The kaleidoscope eyes are two layers of small plastic flowers. I cut the petals to give them more of a kaleidoscope look. The ‘diamonds’ are hot fixed crystals. The ‘cellophane flowers’ are made of yellow and green painted cellophane. The taxi is made of newspaper and the water in the fountain is puff paint and beads painted with Lumiere paints. The most amazing thing is that all of the items used were actually in my stash. All was free motion quilted.
If you haven't guessed by now the songs are 'Devil With The Blue Dress' by Mitch Ryder and the Detroit Wheels and 'Lucy In the Sky With Diamonds' bu the Beatles.
Subscribe to:
Comments (Atom)